We love reusable food wraps because they are flexible, adhesive and plastic free. They are a great eco friendly alternative to single use plastic wrap and keep your foods fresh for longer. Using a food wrap can help to maximise the flavour of your food and reduce food waste.
Vegan wax wraps are perfect for:
- storing cut vegetables,
- fruit,
- wrapping up sandwiches or snacks in a lunch box or for a picnic
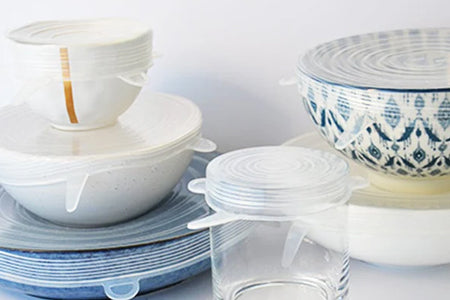
- replacing plastic wrap to cover bowls, jars, mugs
DIY wax wraps are a fun activity to do at home with the family, you can let the kids pick their own fabric. These are super simple to make, and the recipe is adjustable so you can choose the 'stiffness' of your wraps. Make your own vegan food wraps at home with this simple recipe, you can also purchase already made beeswax wraps from our food storage collection here.
WHAT YOU NEED⠀⠀⠀⠀
- 25cm square of 100% cotton fabric. Preferably organic cotton which is thin and tightly woven. We recommend using a patterned or dark colour piece of fabric as they don't show marks. If you want to make smaller wraps we recommend cutting to size once cooled. You can buy 100% cotton fabric from a store like Spotlight or Lincraft or recycle a cotton tablecloth or T-shirt.
- 20g wax. You can use candelilla wax for a plant based vegan option or you can use solid beeswax or beeswax pellets. ⠀⠀⠀⠀⠀⠀⠀
- 2g coconut oil or jojoba oil. You can use more oil if you prefer a thinner consistency to your wax wrap.
- 5 - 10g pine rosin. This is a kind of tree sap, to will help to make your wraps stiffer and give them an adhesive sticky feeling. You can make the wraps without the resin if you can't find any.
HOW TO MAKE
- Prepare your fabric: Place your washed and dried fabric onto a baking sheet covered with a piece of compostable parchment paper or a silicone baking sheet. It's best to use something to prevent the wax melting onto your baking tray.
- Preheat your oven on medium low – around 150 C
- Melt the mixture using a double boiler: A double boiler is the best way to melt your wax. Simply place the wax and resin in a metal bowl which is placed on top of a pot of hot water. This will give you more temperature control and avoid ruining your cooking pots.
- Combine the wax, pine rosin and jojoba or coconut oil in a double boiler on the stovetop to melt, stir to combine (proportions are noted below in the ingredients section). It could take a little time depending on how large your chunks of wax and rosin are. Grating the wax first will help it to melt faster.
- Note: If you don't want to use the double boiler you can grate your wax and sprinkle your wax, rosin and oil directly onto your fabric
- Infuse the fabric: Drip or paint the wax mixture onto the fabric, then place in the oven for 3 minutes on 150 C. Flip over and put back in for a further minute.
- Hang the wrap to cool: Remove the fabric from the oven. Check that the wax has covered the fabric evenly and there aren't any patches. Remove from the oven and drape over a drying rack to cool and air dry. If patchy you can add more of the mixture and reheat.
- Finally if you want to make smaller wraps you can cut them to a desired size once cool.
TIP: if you choose to melt your mixture in a double boiler you can pour any leftover into silicone ice cube molds and let them set. When cooled they can be grated like beeswax blocks. Very handy to have on hand for re-waxing or if you have extra left over.⠀⠀⠀⠀⠀⠀⠀⠀⠀
CARING FOR YOUR WRAPS
Your DIY wax wraps can last for 5 - 6 months or 120 - 150 uses, depending on how well you take care of them. Here are some tips for making them last:
- Hand wash your wraps in cool water with mild dish soap, allow to dry, fold and store. Keep away from sources of heat such as hot water, dishwashers, microwaves or ovens. The heat will cause the wax to melt and you wraps won't last as long.
- Keep away from greasy and acidic foods. We recommend avoiding direct contact with raw mean and citrus fruits as these can tarnish your wraps.
- Feel free to cut your wraps to an ideal size once they have cooled.
- If your wraps feel stiff after storage you can soften them by squishing them into a ball and using the warmth of your hands to activate the wraps.
For more great DIY ideas and food storage solutions check out our collection here.